Key Takeaways
- Moisture comes through concrete floors by three main routes: capillary suction, hydrostatic pressure, and condensation; each needs a different fix.
- Before applying any treatment, test whether you have a moisture problem and identify the source; skipping this step wastes time and money.
- For most DIY homeowners, a penetrating concrete sealer handles low-to-moderate moisture; a sheet membrane or epoxy coating is needed for high moisture or below-grade floors.
- Cleaning the surface, repairing cracks, and grinding are critical steps that help treatments bond properly and maintain their durability over time.
- Expect to spend $1-$5 per square foot on materials depending on the method you choose.
Why Moisture Comes Through Concrete Floors?
Concrete is not waterproof. It has millions of tiny pores that absorb and transfer water constantly. Three separate processes drive moisture up through a concrete slab.
Capillary suction pulls groundwater up through the pores of the concrete the same way a paper towel absorbs a spill. This is the most common cause in older homes without a sub-slab vapor barrier.
Hydrostatic pressure happens when water in the ground builds up around or beneath the slab, usually after heavy rain or in areas with a high water table. The pressure physically pushes water through the concrete.
Condensation forms when warm, humid air hits a cool concrete surface, leaving surface moisture that looks like a leak but comes from above, not below.
Identifying which type you have changes everything about the fix.
How to Test Whether You Have a Moisture Problem
You need to confirm moisture is coming through the slab, not condensing on top of it, before spending anything on materials.
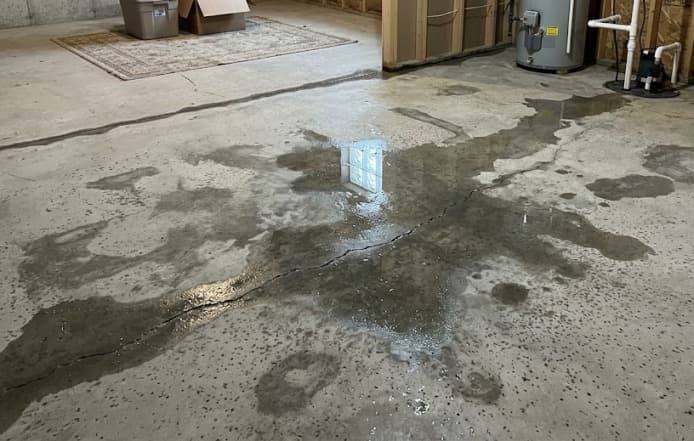
The plastic sheet test is the standard DIY method. Tape a 60 x 60 cm (2 x 2 ft) piece of clear plastic sheeting flat to the concrete floor. Seal all four edges with duct tape. Leave it in place for 24-48 hours.
- Moisture on the underside of the plastic = moisture is rising through the slab
- Moisture on the top side of the plastic = condensation from the air above
- Moisture on both sides = you have both problems
A moisture meter gives a more precise reading. Readings above 75% relative humidity (RH) at slab level meet the threshold for a serious moisture problem that requires a barrier or membrane, not just a sealer.
What You Need Before You Start
- Plastic sheeting and duct tape (for testing)
- Concrete grinder or floor sander (rentable from most hardware stores)
- Concrete crack filler or hydraulic cement
- Stiff-bristle brush and concrete cleaner or degreaser
- Your chosen treatment: penetrating sealer, epoxy coating, or sheet membrane
- Paint roller, brush, or squeegee depending on the product
- Safety glasses, gloves, and knee pads
- A well-ventilated space – open windows or run fans
Step 1: Find and Fix the Root Cause of Water Entry
Treating the slab surface without fixing the water source is the most common DIY mistake. The treatment will fail within months.
Check these four areas first:
- Gutters and downspouts – make sure they direct water at least 1.5 m (5 ft) away from the foundation. Blocked or short downspouts are behind a large share of basement moisture problems.
- Ground slope – the ground around your home should slope away from the foundation at a minimum grade of 5% (roughly 2.5 cm drop per 30 cm / 1 inch per foot) for the first 1.8 m (6 ft).
- Window wells – check that basement window wells drain freely and are not collecting standing water.
- Interior plumbing – rule out a slow leak from pipes running beneath or near the slab.
If you have a high water table or the floor floods during rain, a sump pump may be needed before any surface treatment makes sense.
Step 2: Clean and Prepare the Concrete Surface
No sealer, coating, or membrane will bond to a dirty or damaged surface. Surface prep is the step most DIYers rush and the main reason treatments peel or fail early.
Clean the floor thoroughly.
- Sweep and vacuum all dust, dirt, and loose debris.
- Apply a concrete degreaser to any oily or stained areas. Scrub with a stiff brush and rinse with water.
- Allow the floor to dry completely; minimum 24 hours, ideally 48 hours in humid conditions.
Check the surface profile. Run your hand across the concrete. A penetrating sealer needs a clean, slightly open surface.
An epoxy coating or membrane needs a rougher profile to bond. Rent a concrete grinder from a hardware store and go over the entire floor once. This opens the pores and removes any existing paint, sealer, or contamination.
Test for existing sealer. Pour a small amount of water on the floor. If it beads up, there is already a sealer present. That sealer must be ground off before applying a new treatment, new product will not bond over old.
Step 3: Repair All Cracks and Gaps
Every crack in the slab is a direct path for water. Seal them before applying any surface treatment.
For hairline cracks (under 3 mm / 1/8 inch wide): Use a concrete crack filler or polyurethane caulk. Work it into the crack with a putty knife, smooth flush with the surface, and allow to cure per the product instructions.
For larger cracks or active leaks (water currently seeping through): Use hydraulic cement. This product sets in minutes and can be pressed directly into a crack even while water is flowing.
Mix to a stiff putty consistency, press firmly into the crack, and hold in place for 3-5 minutes while it hardens.
For expansion joints and floor-wall joints: These joints are designed to move. Use a flexible polyurethane or silicone sealant rated for below-grade use; not rigid cement, which will crack again as the joint moves.
Step 4: Choose the Right Moisture Treatment
The correct product depends on how much moisture you have and where the floor sits relative to ground level.
| Situation | Best Treatment | Approx. Cost (per sq ft) |
|---|---|---|
| Mild dampness, above-grade slab | Penetrating concrete sealer | $0.50 – $1.50 |
| Moderate moisture, basement floor | Epoxy moisture barrier coating | $2.00 – $4.00 |
| High moisture or hydrostatic pressure | Sheet vapor membrane (self-adhesive or torch-applied) | $3.00 – $5.00 |
| Active water intrusion with flooding | Sump pump + interior drain channel | $1,500 – $4,000 installed |
Penetrating sealers soak into the concrete and react with it to block the pores from within. They do not change the look of the floor and last 5-10 years. These products are effective for controlling minor moisture issues, but they are not designed to withstand hydrostatic pressure.
Epoxy moisture barrier coatings sit on top of the slab and form a continuous waterproof layer. They handle moderate moisture and double as a finished floor surface.
Moisture vapor transmission (MVT) must be below 3 lbs per 1,000 sq ft per 24 hours before applying most epoxy products.
Sheet vapor membranes are the strongest option for below-grade floors with high moisture. They lay flat over the slab and are lapped up the walls. Flooring goes directly over the top.
Step 5: Apply the Treatment
Application steps vary by product type. Follow the instructions on your specific product; the guidance below covers the general process for each method.
For a penetrating sealer:
- Pour sealer onto the floor in sections and spread with a paint roller or squeegee.
- Work it into the surface using circular motions.
- Allow it to soak in for 5-10 minutes, then remove any excess sealer that has not absorbed – pooled sealer leaves a sticky residue.
- Apply a second coat if the first coat absorbed fully and the floor still looks thirsty.
- Allow 24 hours before foot traffic.
For an epoxy moisture barrier coating:
- Mix Part A (resin) and Part B (hardener) per the product ratio – usually 2:1 or 1:1 by volume. Mix for the full time listed, typically 3-5 minutes.
- Pour onto the floor and spread with a notched squeegee or roller to an even thickness – usually 10-15 mils wet.
- Allow the first coat to cure until it is firm but slightly tacky (check product data sheet for timing – usually 8-12 hours).
- Apply the second coat in the opposite direction for uniform coverage.
- Full cure takes 72 hours before heavy use.
For a sheet vapor membrane:
- Roll the membrane out across the floor, starting at one wall.
- Overlap adjacent sheets by at least 15 cm (6 inches).
- Tape all seams with the membrane’s compatible seam tape.
- Run the membrane 10-15 cm (4-6 inches) up each wall and secure with compatible tape or adhesive.
- Lay your finished flooring directly on top.
Read Also: How to Seal a Garage Floor from Moisture
Step 6: Check Your Work and Maintain the Treatment
Once the treatment is in place, re-run the plastic sheet test after 7 days to confirm the moisture is blocked.
Check the treated floor once a year:
- Look for bubbling or delamination in epoxy coatings; this signals moisture has found a path through and the coating needs repair or replacement.
- Re-apply penetrating sealer every 5-7 years or when the water-bead test shows the sealer is no longer active.
- Inspect sheet membrane seams for lifting edges and re-tape if needed.
If moisture returns despite the treatment, the root cause (drainage, hydrostatic pressure, or a pipe issue) has not been resolved and needs professional assessment.
Conclusion
Moisture can damage concrete floors over time. The key is finding the source before choosing a solution.
Test the slab, fix any drainage issues, and repair cracks. Then apply the right sealer, coating, or membrane for your situation.
With proper preparation and maintenance, you can keep your concrete floor dry, durable, and protected for years to come.