To stop efflorescence on basement walls, stop the water that carries salt to the surface. The white crust ends when moisture stops moving through the wall. Slope the soil at least 6 inches over the first 10 feet from the foundation, extend downspouts 5 to 10 feet away, and repair cracks and mortar joints.
Once the wall stays dry, brush off the deposits and seal the wall with a vapor barrier or masonry coating. Cleaning first fails, because water still moving through the wall brings the salt back.
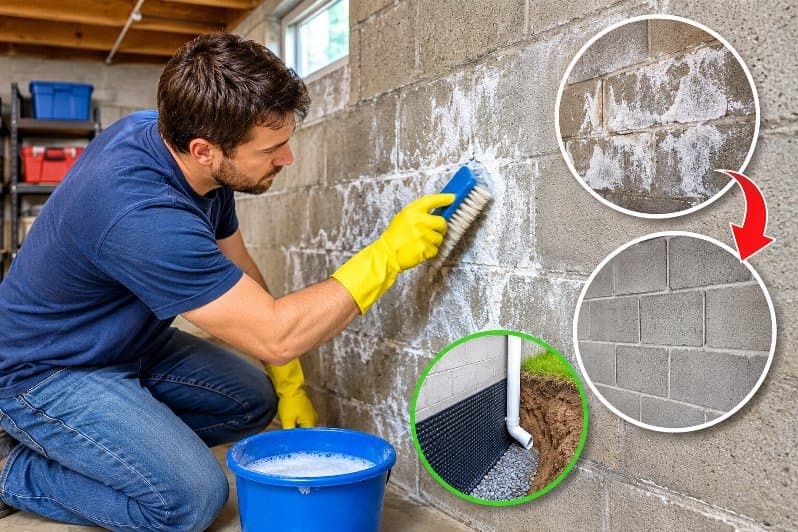
What Causes Efflorescence on Basement Walls?
Efflorescence is a white or gray crystalline salt deposit. It forms when water dissolves salts inside concrete, block, or mortar, carries them to the wall surface, and evaporates.
The water leaves and the salt stays behind. The salts are built into the wall, so the only practical fix is to cut off the water.
Three conditions must exist at the same time:
- Soluble salts must be present in the masonry, the mortar, or the soil touching the wall.
- Moisture must be present to dissolve those salts and carry them toward the surface.
- Evaporation or water pressure must push the salty solution outward.
If any one of these is missing, efflorescence does not form. Removing the salts is not realistic. Salt levels of only a few tenths of one percent are enough to leave visible deposits.
Think of the wall as a candle wick. The wick holds the wax, but the flame only burns when the wax rises. Salt sits in the wall the same way, and moisture is what lifts it into view.
Season matters. Efflorescence is usually more common in winter, because slower evaporation gives salts time to travel to the surface. Soil against an unprotected basement wall is another salt source, and the compounds can move a foot or two above grade.
How Do You Tell Efflorescence From Mold?
Spray a little water on the deposit. Efflorescence is salt, so it dissolves and disappears.
Mold is biological, so it stays put. Do this test before you buy any cleaner, because the two problems need different fixes.
Other clues help. Efflorescence sits on bare masonry, feels gritty and crystalline, and is never fuzzy.
Mold looks soft or cottony and grows on organic material such as wood, drywall, and stored cardboard.
If the deposit is fuzzy, or sits on a wooden stud or drywall, treat it as possible mold and have it tested.
Is Efflorescence Harmful to Your Health or Foundation?
Efflorescence is generally harmless. It does not weaken the wall by itself. It is a sign that water is moving through the masonry.
It can still cause one practical problem. Some forms, called alkali carbonates, can break down paint and cause it to peel off the wall. That is why painting over the white crust fails.
How to Stop Efflorescence on Basement Walls
The six steps below follow the water. First you find out where the moisture comes from. Then you shut off the outside sources, repair the wall itself, control the air inside, clean the wall, and finally protect it.
The order matters, because cleaning a wall that is still wet only brings the crust back.
Step 1: Find Out How Water Reaches the Wall
Use a plastic sheet test to learn whether moisture comes through the wall or forms on it.
Tape a clear plastic sheet, about 2 feet by 2 feet, tightly to the wall on all four edges. Leave it for 24 to 48 hours.
Droplets on the wall side of the plastic mean moisture is moving through the masonry. Droplets on the room side mean humid indoor air is condensing on a cool wall.
Many basements have both, so repeat the test in a few spots, including near the floor and near the damp areas.
Step 2: Send Roof and Yard Water Away From the Foundation
Water that reaches the soil next to the foundation is the most common source, and the cheapest to fix.
Aim for a slope of 5 percent, which is 6 inches of fall over 10 horizontal feet from the wall. Check it with a level and a tape measure.
Then check the downspouts. Extensions should send water 5 to 10 feet away from the foundation. Clean the gutters so they do not overflow against the wall.
Two more outside sources are easy to miss:
- Lawn sprinklers and garden beds that soak the foundation should be moved or aimed elsewhere.
- Wide roof overhangs shield walls from rainfall, so keep them in place where you can.
Step 3: Repair Cracks and Mortar Joints
Repair every crack, gap, and failed mortar joint that lets water into the wall.
Mortar joints that are deteriorated or defective should be repointed to keep moisture out. Caulk around window and door openings, and seal or repair cracked joints.
A single crack repair costs about $250 to $1,000. If cracks are leaking in several places, move to the professional options below instead of patching one at a time.
Step 4: Control Humidity Inside the Basement
Keep indoor relative humidity between 30 and 50 percent, and never above 60 percent.
Buy a hygrometer, a small meter that reads humidity, and check it for a week before you decide on equipment.
A dehumidifier removes moisture from the air, but it cannot stop water pushing through the wall.
Fix the source first. Size the unit for the space. A 30 pint unit often removes only 20 to 25 pints per day in a cool, damp basement.
Also vent the clothes dryer outdoors and run bathroom fans after showers.
Step 5: Clean the Wall Once It Stays Dry
Clean after the moisture source is fixed, and start with the gentlest method.
Efflorescence often disappears on its own, or needs only dry brushing or a stiff brush with a little water. Avoid washing the wall right away in cool, damp weather, because that adds water to the masonry.
If brushing fails, the right cleaner depends on the salt.
| Compound | Recommended cleaning method |
|---|---|
| Alkali sulfate | Stiff brush. If necessary, brush with water. |
| Calcium sulfate | Stiff brush. If the deposit is chronic, add water washing. |
| Calcium carbonate | Stiff brush if it is loose. If it is stuck to the wall, use a dilute acid or a proprietary cleaning solution. |
When acid is needed, use a very dilute muriatic acid solution of 1% to 10%. For colored concrete block or colored mortar, use only 1% to 2% or a cleaner made for that material.
Test a small hidden spot first. Rinse the wall thoroughly with clean water afterward.
Wear gloves and eye protection, ventilate the room, and never mix acid with bleach.
Wrong cleaning can etch the surface, damage mortar joints, and cause more efflorescence.
Step 6: Protect the Wall and Watch It Through Winter
Apply a vapor barrier or vaporproof paint to the interior surface of exterior walls only after the wall is clean and dry. Painting too early traps moisture and salts behind the coating, and the paint can fail.
An interior coating is a finishing step, not a cure. It does not stop water entering from outside, and water pressure behind it can push it off the wall.
Check the wall again after the next heavy rain and through the winter. Efflorescence from a one time source fades with time unless moisture keeps moving through the wall.
If white deposits return in the same spot within a season, water is still getting in.
When Should You Call a Basement Waterproofing Professional?
Call a basement waterproofing professional when white deposits return after you have fixed the grading, downspouts, and cracks, or when the wall feels damp or shows water after rain. Recurrent efflorescence points to a chronic moisture problem that needs correction before cleaning.
National cost ranges give you a way to judge quotes. Costs below vary by region and basement size.
| Repair | Typical cost |
|---|---|
| Crack repair | $250 to $1,000 per crack |
| Interior perimeter drain | $40 to $120 per linear foot |
| Sump pump | $600 to $2,500 |
| Interior vapor barrier | $1,500 to $4,000 |
| Full waterproofing job, national range | $3,000 to $10,000 |
An interior drain means cutting and repairing the concrete floor, which is why it costs more than an exterior drain. Ask each contractor what water source they found, not only which system they sell.
Conclusion
Efflorescence on a basement wall is a salt deposit, and the salt only appears when water carries it there.
Fix the water path first, starting with the ground slope and downspouts, then cracks and mortar joints. Clean the wall after it has stayed dry, and coat it last.
If the crust returns after those steps, get quotes from licensed waterproofing contractors and ask each one to name the water source they found.