A roof leak rarely starts where the water shows up inside your house. Water travels along rafters and decking before it drips onto a ceiling, so the real damage is almost always somewhere else on the roof surface.
Fixing it from the outside means finding that true entry point first, then sealing or replacing whatever let the water in.
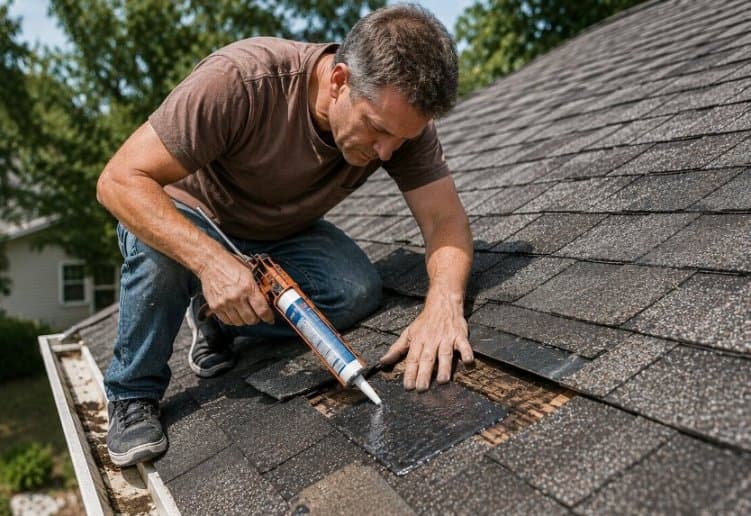
How to Find Where a Roof is Leaking From the Outside?
Locate the leak by tracing water stains inside back to their highest point, then checking the matching area on the roof from outside.
Start in the attic if you have one. Turn off the lights and look for daylight coming through gaps in the decking, since even a small hole will show a pinpoint of light.
If the attic check does not reveal anything, use the hose test. Have one person stay inside near the stained ceiling area while a second person sprays water on the roof section directly above and slightly uphill from that spot.
Work in stages: spray one small section for several minutes, wait for a report from inside, then move to the next section if nothing shows up. This isolates the exact spot instead of soaking the whole roof at once.
From the ground or a ladder, scan for the usual trouble spots: curled or missing shingles, cracked or lifted flashing around chimneys and vent pipes, and debris built up in valleys where two roof slopes meet.
These penetration points account for the majority of exterior leaks, more often than open shingle fields.
Check Also: How to Identify Hail Damage by Roofing Material
How to Fix a Leaking Roof From the Outside
This walkthrough covers six steps, from setting up safely to sealing the finished repair. Follow them in order so the surface is clean and dry before any sealant goes on.
Step 1: Set Up Your Ladder Safely
Place the ladder on firm, level ground and extend it so the top rests at least three feet above the roof edge.
Follow the four to one rule: for every four feet of height, move the base one foot away from the wall. Have someone hold or stake the base if the roof is steep or the ground is soft.
Step 2: Clear the Area Around the Leak
Remove leaves, dirt, and granules from around the damaged spot with a stiff brush. Pull away any old, cracked sealant with the pry bar.
A clean, dry surface is required for new sealant or replacement shingles to bond correctly.
Step 3: Remove the Damaged Material
For a damaged shingle, slide the pry bar under the tab above it to release the nails, then lift out the cracked or curled piece.
For damaged flashing, remove the nails holding it in place and set the old flashing aside.
Work carefully so you do not tear the surrounding shingles.
Step 4: Install the Replacement Piece
Slide a new shingle into the gap so it lines up with the surrounding pattern, then nail it in place along the edges, not through the exposed tab.
For flashing, bend the new piece to match the original shape and slide it under the shingle course above the leak so water sheds over it rather than behind it.
Step 5: Seal the Edges
Run a bead of roofing cement or exterior sealant along every edge and nail head on the new piece.
Smooth it with a putty knife so water cannot pool or seep underneath. This step is what turns a mechanical repair into a watertight one.
Step 6: Test and Recheck
Once the sealant has cured according to the product label, repeat the hose test described earlier in the leak finding process.
Have someone check the same interior spot while you run water over the repaired area for several minutes.
If it stays dry, the repair holds. If any moisture shows up, the entry point may be slightly different from where you patched, and you will need to widen the inspection area.
Repair Difficulty by Roof Type
The zone tells you what failed. The material tells you how hard the fix is. Use this table to gauge what you are taking on before you start.
| Roof Type | Typical Failure Point | DIY Difficulty | What Makes It Harder |
|---|---|---|---|
| Asphalt shingles | Wind lifted tabs, worn vent boots | Easier | Widely available replacement parts |
| Metal panels | Seam separation, fastener backout | Moderate | Requires panel specific sealant and careful fastener matching |
| Flat or rolled roofing | Seam splits, ponding water damage | Moderate | Seams must be heat or solvent welded for a lasting seal |
| Wood shakes | Split shakes, moss trapped moisture | Harder | Matching weathered wood color and thickness |
| Tile roofing | Cracked or slipped tiles | Harder | Tiles are brittle and easy to crack further while walking |
Why the Same Spot Keeps Leaking After You Patch It
A repeat leak almost always means the wrong zone got fixed, not that the sealant failed.
Sealing the interior drip point instead of tracing it to the roof surface leaves the actual opening untouched. Using indoor caulk on an exterior repair breaks down fast under sun and heat, since it was never rated for that exposure.
Sealing over a surface that has not fully dried traps moisture underneath the patch, which encourages rot rather than stopping it.
And a boot or flashing patch applied over material that is already brittle or corroded buys a few months at best.
If a fix keeps failing in the same location, go back to the hose test and confirm you are working on the zone that is actually open, not the zone that looks the most obviously damaged.
When DIY Stops Making Sense
Some situations call for a professional roofer instead of another weekend on the ladder. Soft, spongy, or sagging decking underneath the shingles signals structural rot that a surface patch will not fix.
A roof pitch too steep to stand and walk on safely needs harness and anchor equipment most homeowners do not own.
A roof past 20 years old with damage spread across multiple zones, rather than one isolated spot, is usually closer to a full replacement than a patch job.
In any of these cases, a roofer’s inspection costs far less than a failed DIY attempt that has to be redone professionally anyway.
Frequently Asked Questions
Why does my roof leak only during heavy rain, not light rain?
Heavy rain overwhelms marginal weak points, such as a slightly lifted shingle or a gutter that is nearly clogged, that light rain never puts enough volume through to expose. The zone is already compromised. Heavy rain just reveals it faster.
Can I use roofing cement on every type of roof leak?
No. Roofing cement works well on asphalt shingles and some flashing repairs, but metal panels need metal rated sealant and rolled or flat membranes need heat or solvent welded seams rather than cement.
How long does a vent pipe boot last before it needs replacing?
Rubber vent boots typically crack from sun exposure years before the surrounding shingles wear out, which is why a boot is one of the first places to check even on a relatively young roof.
Is a leaking valley more serious than a leaking shingle?
Generally yes, since valleys carry more water volume than any other part of the roof. A failure there tends to let in more water faster than a single lifted shingle elsewhere on the field.
How do I know if it is safe to walk on my roof to fix a leak?
Check the pitch and the material. Low slope asphalt roofs in dry weather are generally walkable with caution, while steep pitches, wet surfaces, or brittle materials like older tile call for a professional with proper fall protection.
What tools do I actually need for an exterior roof repair?
A stable ladder, roofing cement or material specific sealant, a pry bar, matching replacement shingles or flashing, roofing nails, and a caulking gun cover most single zone repairs.
Conclusion
Fixing a leaking roof from the outside comes down to two things: finding the real entry point and sealing it properly with the right materials for your roof type.
Most small leaks, a cracked shingle or a gap in flashing, are within reach of a careful homeowner with basic tools and a safe way to access the roof.
Anything involving structural damage, a steep pitch, or a roof nearing the end of its lifespan is worth handing to a professional before a small leak turns into a larger repair.