Concrete sidewalks can become dangerous over time. Weather, tree roots, and wear and tear can cause uneven surfaces. These trip hazards are not just inconvenient; they pose a safety risk. People can fall and injure themselves. Addressing these issues is crucial for safety and peace of mind.
Removing trip hazards involves several methods. Grinding down raised sections is one option. Filling in cracks with patching compounds is another. Sometimes, replacing entire sections is necessary.
Each solution depends on the severity of the problem. Simple tools and techniques can make sidewalks safe again. Fixing these issues not only improves safety but also enhances the appearance of your property. It’s a task that benefits everyone in the community.
Identifying Trip Hazards
Before you can remove trip hazards, it’s essential to thoroughly inspect the concrete sidewalk. Walk along the sidewalk, paying attention to areas that may pose risks.
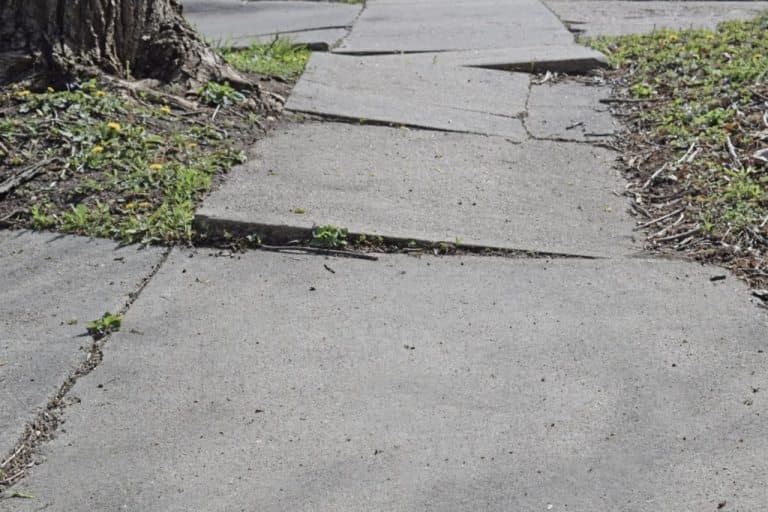
Cracks and gaps in the sidewalk are obvious signs. Uneven surfaces can cause trips. Raised edges are dangerous. Watch for missing pieces of concrete. Look for areas where the sidewalk is sinking. These signs indicate potential hazards.
Trips can cause serious injuries. Broken bones are common. Scrapes and bruises happen often. Elderly people are at higher risk. Children may fall and hurt themselves. Hazards can lead to costly medical bills. Preventing these risks is crucial.
How Do Remove Trip Hazards From Concrete Sidewalks
Gather the necessary tools before starting. You will need a measuring tape to check the height of the hazard. Also, have a chalk or marker to mark the areas. A level helps ensure the ground is even. Bring a notepad to record your findings. A camera can be useful to take photos for reference.
Concrete Grinding
Concrete grinders come in various types. You can choose handheld grinders. They are easy to use and control. Walk-behind grinders are another option. They cover more area quickly. Both types have diamond-tipped blades. These blades smooth the concrete surface. Choose the right grinder for your sidewalk size.
Start by marking the trip hazards. Use chalk or paint. Begin grinding from the highest point. Move the grinder in a circular motion. This ensures even grinding.
Make sure to wear safety gear. Goggles and gloves are essential. Dust can be harmful. Use a vacuum attachment on the grinder. This keeps the area clean. Regularly check the grinder blades. Sharp blades work best. Smooth out the edges after grinding.
Slab Jacking
Slab jacking is a method to fix uneven concrete. It uses a special grout. The grout is injected under the slab. This lifts the concrete. The process starts with drilling small holes. The grout is then pumped through these holes. The concrete slab rises and becomes level. This technique works quickly.
Benefits of Slab Jacking
- Non-invasive, preserves existing concrete
- Fills voids to prevent further sinking
- Fast setting time with polyurethane options
- Cost-effective compared to full replacement
Limitations
- May not be suitable for severely broken slabs
- Requires access for equipment and injection
Concrete Replacement
Old sidewalks can have many trip hazards. Sometimes, it’s best to replace them. New concrete can last long and look nice. Choose replacement if the cracks are deep. Also, if the surface is uneven or broken. These issues can be dangerous. A smooth sidewalk is safer.
Replacement Steps
- First, mark the area to replace. Then, break the old concrete. Use a jackhammer or sledgehammer. Remove all pieces and clean the area.
- Next, prepare the ground. Make it flat and compact. Pour new concrete and spread it evenly. Use a trowel for a smooth finish. Let the concrete dry completely. This takes a few days.
- Finally, check for any uneven spots. Fix them if needed.
Now, your sidewalk is safe!
Concrete Overlay
A concrete overlay is a resurfacing technique where a thin layer of new material — typically a cement-based or polymer-modified mixture — is applied directly over existing concrete. This method is used to correct minor surface imperfections, smooth out uneven areas that present trip hazards, and enhance the overall appearance of aging sidewalks.
Rather than tearing out and replacing the concrete, overlays provide a cost-effective solution that restores both safety and style. They are especially popular for improving the look and safety of sidewalks in commercial properties, residential areas, parks, and public walkways.
Overlay Application Process
Proper preparation and professional application are critical to ensuring the overlay bonds well and lasts for years. The general process includes:
- Surface Preparation: The existing concrete is thoroughly cleaned using high-pressure washing or mechanical grinding to remove dirt, oil, coatings, or other contaminants that could interfere with adhesion.
- Crack Repair and Patching: All cracks, spalls, and damaged areas are filled with epoxy or polymer – modified repair materials to create a uniform base.
- Priming and Bonding Agent Application: A bonding primer or adhesive is applied to enhance the connection between the old concrete and the overlay mix.
- Mixing and Pouring the Overlay: The overlay material is mixed according to manufacturer specifications and poured or sprayed onto the prepared surface, depending on the overlay type.
- Smoothing, Texturing, and Finishing: The material is troweled, brushed, or stamped to achieve the desired texture or pattern. Slip-resistant additives can be incorporated for enhanced safety.
- Curing and Sealing: Once the overlay has cured properly (usually 24–72 hours), a high-quality concrete sealer is applied to protect against moisture, stains, and wear.
Using Fillers And Patches
Polyurethane fillers are good for small cracks. They are flexible and strong. Epoxy fillers work well for larger gaps. They bond tightly to the concrete.
Cement-based fillers are best for deep holes. They set hard and last long. Latex fillers are easy to use. They dry quickly and can be painted. Choosing the right filler is important. It helps keep the sidewalk safe.
Clean the area before applying fillers. Use a brush to remove dirt. Fill the crack completely. Make sure there are no air bubbles.
Smooth the surface with a trowel. Wait for the filler to dry. Follow the instructions on the package. Each filler has different drying times. Keep the sidewalk dry during this time. This ensures a strong bond.
Cost Comparison of Trip Hazard Removal Methods
| Method | Approximate Cost per Sq Ft | Best For |
|---|---|---|
| Grinding | $3 – $5 | Small vertical displacements |
| Slab Jacking | $5 – $10 | Sunken slabs, moderate damage |
| Replacement | $8 – $15+ | Severely damaged or old concrete |
| Overlay | $5 – $12 | Surface damage, aesthetic updates |
| Slicing | $6 – $10 | Uplifted edges with clean finish |
Prices vary based on location, size, and accessibility.
Preventive Measures to Avoid Future Trip Hazards
Proactively maintaining sidewalks is essential for public safety, property value, and liability protection. Once trip hazards have been corrected, it’s equally important to implement preventive strategies to reduce the risk of recurrence.
- Root barriers for nearby trees
- Regular inspections and maintenance
- Proper drainage systems to avoid soil washout
- Joint sealing to prevent water infiltration
- Compacted subgrades during new installations
By proactively maintaining your walkways, you can extend the lifespan of your concrete and reduce injury risks significantly.
Conclusion
Fixing trip hazards on concrete sidewalks enhances safety. Regular maintenance prevents accidents. Use simple tools like grinders or patching kits. Ensure the surface is level and smooth. This creates a safer walkway for everyone. Inspect sidewalks often for cracks or uneven spots.
Repair them promptly to avoid bigger issues. A well-maintained sidewalk is crucial for community safety. Make it a priority. Keep pathways safe and accessible. Your proactive efforts can make a big difference. Thank you for reading and ensuring safer sidewalks!